Electrical diagrams are essential tools for electricians, helping them design, install, and troubleshoot electrical systems. These diagrams represent the connections and components in a circuit using standardized symbols and layouts. For trade school students, learning how to read and interpret electrical diagrams is a critical skill that can significantly improve their efficiency and problem-solving abilities.
This guide will explain the basics of electrical diagrams, common symbols, and tips to interpret them effectively.
What is an Electrical Diagram?
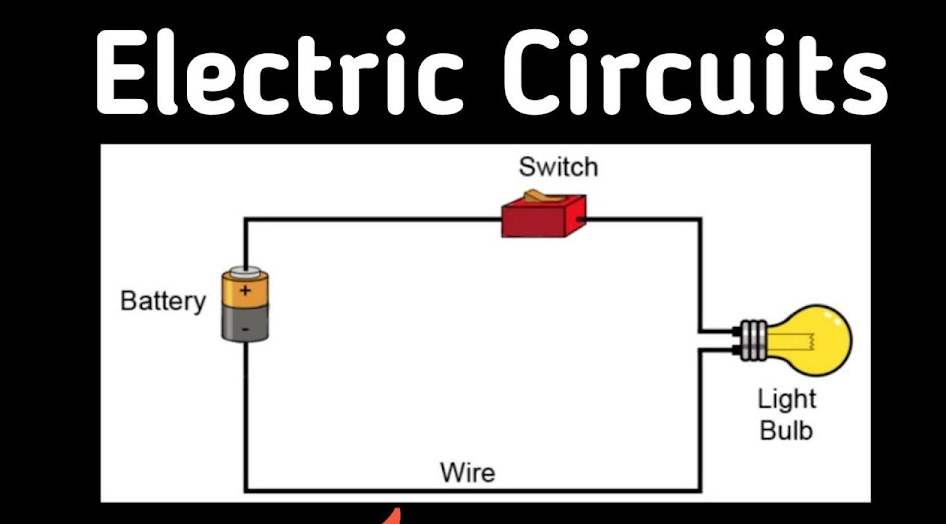
An electrical diagram, also known as a schematic or wiring diagram, is a visual representation of an electrical circuit. It shows how components like switches, outlets, wires, and devices are connected. These diagrams help electricians understand the layout and functionality of a system before working on it.
There are three main types of electrical diagrams:
- Schematic Diagram: Focuses on the function of components without showing their physical placement.
- Wiring Diagram: Provides a detailed view of the physical connections and layout.
- Block Diagram: Offers a high-level overview of the system, showing major components and their interconnections.
Why is it Important to Understand Electrical Diagrams?
Knowing how to interpret electrical diagrams is essential for several reasons:
- Design: Helps in planning and creating efficient electrical systems.
- Troubleshooting: Aids in diagnosing and fixing issues quickly.
- Safety: Ensures accurate connections, reducing the risk of accidents.
- Compliance: Helps meet industry standards and regulations.
Common Symbols in Electrical Diagrams
Electrical diagrams use standardized symbols to represent components. Here are some common ones:
- Switch: Represented by a break in a line with a diagonal line or a small circle.
- Light Bulb: A circle with a cross inside.
- Resistor: A zigzag line.
- Capacitor: Two parallel lines, one solid and one dashed.
- Ground: Three horizontal lines stacked vertically, decreasing in length.
- Power Supply: A circle with a plus (+) and minus (-) sign.
Familiarize yourself with these symbols to read diagrams more effectively.
Steps to Read an Electrical Diagram
Follow these steps to interpret an electrical diagram accurately:
- Identify the Components: Recognize all the symbols in the diagram and understand their functions.
- Trace the Connections: Follow the lines to see how components are connected to each other and the power source.
- Understand the Layout: Note whether the diagram is a schematic, wiring, or block diagram to adjust your interpretation.
- Check Voltage and Current Paths: Identify the flow of electricity through the circuit.
- Verify Circuit Logic: Ensure that switches, relays, and other devices are functioning as expected in the diagram.
Tips for Beginners
Here are some practical tips for trade students learning to read electrical diagrams:
- Start Simple: Begin with basic circuits before moving on to complex diagrams.
- Use Reference Guides: Keep a chart of electrical symbols handy for quick reference.
- Practice Regularly: Solve diagram interpretation exercises to build confidence.
- Work Hands-On: Try assembling circuits based on diagrams to understand them better.
- Ask for Guidance: Don’t hesitate to seek help from instructors or experienced electricians.
Applications of Electrical Diagrams
Electrical diagrams are used in various fields, including:
- Home Wiring: For designing and troubleshooting residential electrical systems.
- Industrial Systems: Used to manage machinery and production lines.
- Automotive Wiring: To design and repair vehicle electrical systems.
- Appliance Repair: For fixing electrical appliances like refrigerators and air conditioners.
Conclusion
Learning how to read and interpret electrical diagrams is a critical skill for anyone in the electrical trade. By understanding the symbols, tracing connections, and practicing regularly, you can become proficient in using these essential tools. Start with simple diagrams, work your way up to more complex systems, and soon you’ll be designing and troubleshooting like a pro!